How to make a sleeping bag
I searched for tutorials for making sleeping bags for children, but nothing came up that fitted what I wanted to make. So I decided to create my first sleeping bag tutorial if others would like to make a sleeping bag but weren't exactly sure how to proceed. This one is made for my 2 1/2 year old toddler based on one I made before - only this one is longer. You can make is as long or short as you like.
This sleeping bag will have the zip on the right of the body (for the one who wears it), but you can make it either way. Back and front are the same so if you don't put on an applique there is no front and back.
Here is the finished sleeping bag, a close up of the neck area (see the full sleeping bag at the end of the tutorial)
Step 1: Cut the fabric
Take a pattern for a jumper or an actual jumper or old sleeping bag the size you want. Use that to get the shape for the top of the sleeping bag. It has to be nice and lose to be comfortable to sleep in yet not too loose so the child swims in it.
Cut around the line leaving about a centimetre for seam allowance (or as much seam allowance as you prefer). I use snap buttons on the one shoulder, but you can use buttons. Leave an extra centimetre on the top for the right shoulder (or the one that will have the opening) so there is fabric to attach snaps at the end. The left shoulder will be a bit shorter than the right at this stage and the cut piece of fabric will look a bit asymmetrical).
I made the new bag about 15 cm longer than the old one. Measure your child from shoulder to toe and add another 10-15 cm to give room for wriggling and growing. Cut the fabric.
Here's the cut fabric with the zip. The zip I used is recycled from another item and it's a bit too short. I would use one that is about the length from under arm to about knee for ease of putting on and getting off.
Step 2: Attach the zip
Baste each part of the zip on the fabric so the ends meet the hole at the arm. The back and front of the sleeping bag are still seperate. This is when you sew them together from the bottom of the zip and almost down to the end as seen in the photo (before it starts to curve, so it's all still nice and flat).
Then you top stich on the zip on boths sides of the zip. In this photo you see I have done it on the side that's on the bottom of the photo.
Step 3: Sew the front and back together
Then you sew the rest of the front and back of the sleeping bag together, starting with the shoulder that will not have the snap opening and then the rest of it. Now there's only the neck area to do. Here's the photo of where I am at:
Step 4: Making the applique
I wanted to make an applique that would also double as reinforcement for the snaps/ button area. So I designed this possum with the tail that wraps around the neck of the sleeping bag. First I made a little drawing of my idea:
I then measured how big the sleeping bag was exactly and made a 1:1 size of the applique
Which I then transferred onto the fabric of choice (I mirrored it to make it fit the way I wanted on the opening) and cut out
Step 5: Attaching the applique and putting on snap closure
I attached the applique with pins and sewed it on with a zigzag stich. The opening of the sleeping bag was closed with pins the whole time until I was ready to cut open the applique exactly where the opening was. This ensured that the applique would fit perfectly on the opening. I added a little bit of fabric for the part of the opening that was hidden under the snap closure to ensure that there was reinforcement there too. (You can see the cut piece of fabric at the top on the back of the sleeping bag about 1cm x the width of the shoulder)
Then I drew with a bit of chalk the head, eyes, nose etc as I wanted them, and zigzag stiched them in a contrast thread. You see the close up of the face in the photo at the top.
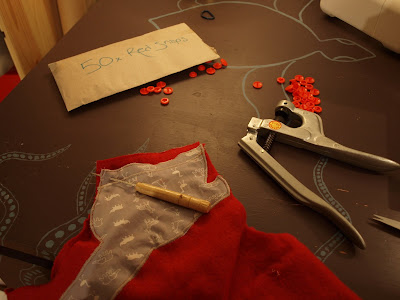
I then attached the snaps for the closure at the top
Step 6: Finishing the sleeping bag
To make the neck a bit warmer, I cut a piece of fabric about 8cm wide and the total length of the neck opening from snap to snap. I attached this (fabric doubled) with a small zigzag stitch all round the neck, a bit like a turtle neck but looser.
Here's a photo with a willing participant wearing it (my toddler was NOT interested in putting on a sleeping bag at this stage!)
I have left the arm openings untouched as the fleece doesn't need to be zigzagged or anything. If you are using a woven or knitted fabric you would need to either hem the arm opening or add bias binding or similar.
Monday, November 15, 2010
Tuesday, February 9, 2010
Summer Dresses
I haven't blogged for a while, but I have still been sewing. Mostly summer dresses for Iluka, but also gifts and other bits and bobs.
This first dress has been my favourite summer dress for Iluka, I think. I love that fabric! Also, a mum at the swimming pool we go to asked me to make one for her, which I did. It's always great when people like what you make.
This other one I made for a dear friend of mine, and although she lives in cooler climates (to say the least) she can put it over tights and long sleeves.
Both dresses are viewed from the back - they don't have buttons at the front.
Sunday, November 29, 2009
Dress
Thursday, November 12, 2009
Ring Sling Baby Carrier
I love how this ring sling turned out! The soft cream colour of the fabric is great for hot summer days, and the blue pocket adds a bit of colour (and convenience!)
The Mathilda's Market took place on the weekend, and it went well. It was fun to see all the other great stalls!
I would have liked to see a few more ring slings go, but they don't have a big profile in Australia and people don't know how great they are, unfortunately. I hope that over time I might open the world of babywearing up to a few people, as it has so many benefits for baby and wearer!
It sure has helped keep me sane on many an occasion :o)
Sunday, November 1, 2009
Monkey Bag
Wednesday, October 21, 2009
Cotton Ring Sling
Tuesday, October 20, 2009
How to use a ring sling (Newborn carry)
Using a Calinou Creation ring sling is really simple, but as with anything it takes a little practice. Here are some pictures that will explain how to use one. In the beginning it is always good to have a partner to support you, and if you don't have that, make sure to use a mirror to be certain that your carry is safe.
Common sense is a must! If it doesn't feel quite right or safe, try again. A safe carry is comfortable for both wearer and baby.
Make sure that the fabric in the sling isn't twisted through the rings, and to make things easier for yourself, spread the fabric out evenly through the rings before you get started
The newborn carry is great for... well.. newborns. It's easy and discreet to breastfeed while slinging - what a bonus!
You start by putting the sling over one shoulder with the rings at the top of your shoulder. The rings will move down as you tighten it. I put the sling on my left side and I am right handed. You could change shoulder every time, but I think most people find a shoulder that feels more comfortable for them.
Hold on to baby with the opposite arm to the one with the sling on it. Throughout all stages you need to support baby's head and neck - as you would no matter what you were doing with a newborn. Baby can face away from the rings or towards them.
Ease him into the sling and make sure there is fabric between him and your body so there is no risk of him falling out. Pull the tail to tighten the sling, pull the top rail to tighten the top of the sling and the bottom rail to tighten the fabric between your body and the baby.
Make sure that baby has good airflow at all times! He should neither be facing the sling fabric or be covered by your breast at any time. It's a good idea to wear baby quite high on your torso - this is more comfortable for the wearer and it makes it easier to check on baby
Enjoy snuggles on the go! Yay!
Labels:
baby carrier,
how to use,
newborn carry,
ring sling
How to use a ring sling (Tummy to Tummy carry)
Using a Calinou Creation ring sling is really simple, but as with anything it takes a little practice. Here are some pictures that will explain how to use one. In the beginning it is always good to have a partner to support you, and if you don't have that, make sure to use a mirror to be certain that your carry is safe.
Common sense is a must! If it doesn't feel quite right or safe, try again. A safe carry is comfortable for both wearer and baby.
Make sure that the fabric in the sling isn't twisted through the rings, and to make things easier for yourself, spread the fabric out evenly through the rings before you get started
You start by putting the sling over one shoulder with the rings at the top of your shoulder. The rings will move down as you tighten it. I put the sling on my left side and I am right handed. You could change shoulder every time, but I think most people find a shoulder that feels more comfortable for them.
Then you take baby and rest her on the shoulder as if you were burping her
Then you ease the fabric over her bottom and lower back right up to the arm pits (or above if baby is happy enough to be carried with arms in)
You then tighten the fabric by pulling lower and upper rails. Baby needs to be seated in the carrier so that the fabric goes all the way to her knees. Her knees should be higher than her bottom so there's no risk of falling out of the carrier.
If it feels like the baby is still quite far from you, you might need to tighten the top rail more. As you do that, baby will sit snugly against your torso and you will not need to support her back with your arms.
For snuggle factor it's still lovely to hold your arms around her, though, and her head is always temptingly close to kiss. From this point of view she sees the world from where you do and it's so easy to communicate about all the stuff you see and experience throughout the day.
This carry, called a Tummy to Tummy carry, can be used when your baby is strong enough to hold her head up.
Arms in or out depends very much on the baby, her age and her mood. It's super easy to adjust the sling as you go and as she changes her mood. Ring slings are also great to use when they reach toddlerhood and want up and down constantly, as they are so easy to put on and take off.
Sunday, October 18, 2009
Reversibles - and lots of them
I love stuff that is reversible! As I am getting ready for Mathilda's Market, I am making lots of different sizes of everything. Here's a unisex safari sunhat
And skirts - this one is stripy on one side
and flowery on the other
This one has sort of geometric flowery pattern on one side
And my favourite Hellokitty fabric on the other
And skirts - this one is stripy on one side
and flowery on the other
This one has sort of geometric flowery pattern on one side
And my favourite Hellokitty fabric on the other
Monday, October 12, 2009
Wednesday, October 7, 2009
Mixed Baby Carriers
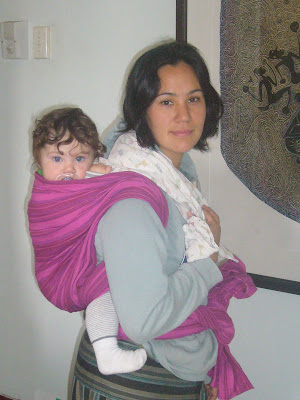
Since having had Iluka I have been very interested in baby carriers and I have made a few myself. Here are some of them:
This one is a Japanese type carrier called an onbuhimo.
It's worn on the back.
Here's a pouch, a simple carrier that needs to be just the right size to be comfortable. It used to be the right size for us, but Iluka grew bigger and now it's not as good anymore.
This is just a piece of cloth, really, that I made a short wrap out of (a shortie)
And another simple piece of cloth, about 4.5m long, made into a wrap
Sunday, October 4, 2009
Trousers and Over-Alls
Over alls are great on boys and girls - in fact, they are just fantastic for any little person who wants to explore everything around them!
However, I have found that trousers are often too long for a while and then they're suddenly too short. So I decided to put elastic at the bottom so even as my daughter was growing into them, they weren't too long and getting in the way, so she could use a pair for much longer. The three pairs of trousers below have elastic at the bottom
This pair has a decorative panel at the bottom, so elastic wasn't such a great idea. But then they are super cute to compensate.
Skirt
Subscribe to:
Posts (Atom)